How to Photograph Reptiles Inside an Enclosure at Home
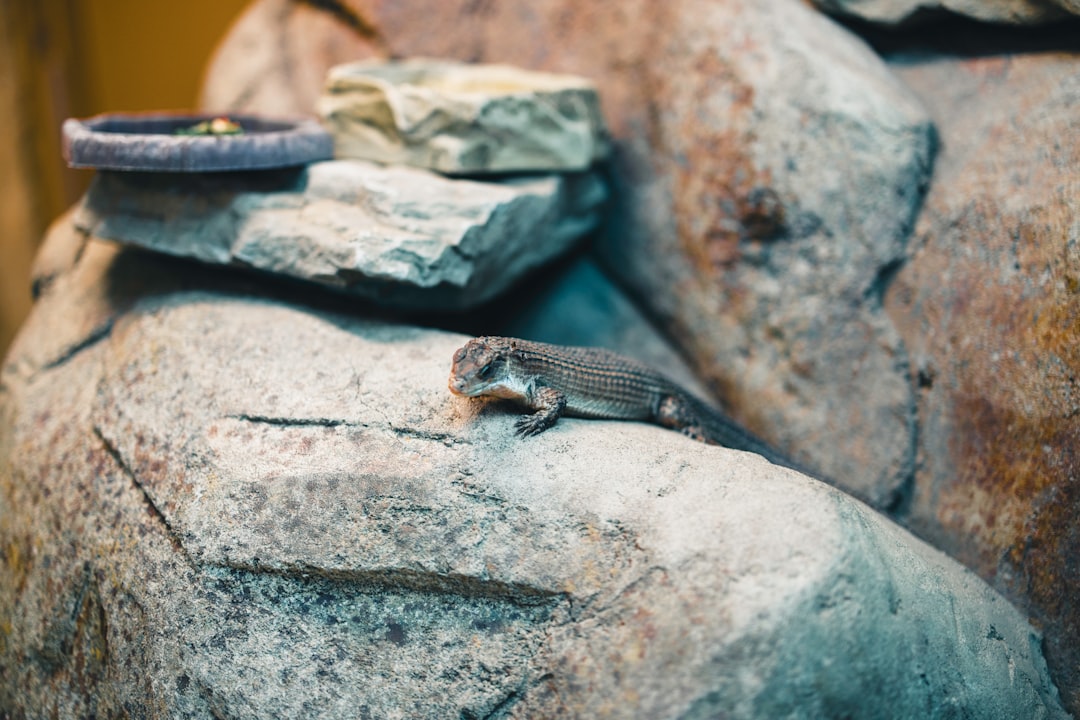 Photo by
 Getting a clear, well-lit photo of your reptile inside its enclosure isn’t easy - live plants, reflective glass, hiding animals, and shifting shadows make enclosure photography one of the trickier aspects of reptile keeping. But whether you’re documenting your gecko’s shedding, capturing behavior patterns, or sharing your setup on social media, learning proper enclosure photography transforms smartphone snapshots into publication-ready images.
In this guide, you’ll learn the lighting, composition, and equipment strategies that professional reptile keepers use to photograph animals in their natural habitat setups. We’ll cover smartphone techniques, DSLR workflows, and the affordable gear that makes a measurable difference - including the Xenvo Pro Lens Kit, a budget-friendly macro and wide-angle option that costs under $30 and clips to any smartphone.
Why Enclosure Photography Is Hard
Photographing a reptile inside a fully-furnished enclosure presents unique challenges compared to studio or open-air photography:
Glass reflections: Enclosure front panels reflect ambient room light, creating blown-out spots and reducing contrast of the actual animal. Glass can obscure fine details of scales, eye structure, and coloration.
Uneven internal lighting: Even with proper UVB and heat lamps, the inside of an enclosure often has dramatic shadows on one side and bright areas on the other. Your camera’s exposure meter struggles to find a middle ground.
Dark hides and dense plants: Crested geckos and many other species spend hours in cork bark, moss boxes, or behind foliage. Capturing the animal without disturbing it means working with minimal ambient light inside the hide.
Focus challenges: When shooting through glass, your camera may focus on the glass surface itself rather than the animal inside. This is especially problematic with smartphones, which have shallow depth-of-field in macro mode.
Color temperature shifts: Incandescent heat lamps and LED grow lights cast warm, orange-tinted light. This causes color shifts in photos - reds look muddy, greens appear yellowish, and scale detail gets lost in warm noise.
Understanding these constraints is the first step to solving them.
Camera Settings and Macro Techniques
Smartphone Photography
Smartphone cameras are surprisingly capable for enclosure work, especially with manual exposure control. Most modern iPhones and Android flagships allow you to:
- Lock exposure: Tap and hold on your subject to lock the exposure meter, preventing the camera from re-adjusting when you move.
- Reduce ISO: If your phone app supports it (or via Pro mode in iOS 17+), lower ISO to 200-400 to reduce noise, even if it means slower shutter speed. You’re likely using a tripod or stabilizer anyway.
- Adjust white balance manually: Select “Daylight” or “Tungsten” presets rather than auto white balance. Tungsten (3200K) often works better for heat-lamp-lit enclosures, counterintuitively.
The key smartphone advantage is portability and minimal startup time. You can position a phone clip or phone tripod inside or very close to the enclosure without the bulk of a DSLR.
DSLR and Mirrorless Settings
If you’re using a dedicated camera:
- Aperture: f/5.6 to f/8 for enclosure work. This balances depth-of-field (keeping the whole animal and background in focus) with light collection. Wide-open aperture (f/2.8) risks parts of the animal being out of focus.
- Shutter speed: 1/250 to 1/500 second. This is fast enough to freeze any animal movement without requiring extreme ISO.
- ISO: Start at 400-800 with proper lighting; adjust down if you add supplemental light. Higher ISO (1600+) introduces noise that obscures scale detail.
- White balance: Set to Tungsten (3200-4000K) if using incandescent heat lamps. Set to Daylight (5500K) if using full-spectrum LED panels. Don’t rely on auto; manual white balance is essential for color accuracy.
Macro Lenses and Detail Work
For extreme close-ups of scales, eyes, or shedding skin, a macro lens or macro clip-on is essential.
Smartphone Macro Clip-Ons
The Xenvo Pro Lens Kit includes a 15x macro lens that clips over your phone’s camera. It lets you photograph individual scales, eye structure, and shed skin at high magnification. The trade-off is a narrower field of view - you see only a small section of the enclosure at a time.
Macro phone photography tips:
- Use bright supplemental light (the macro lens reduces light by roughly 2 stops).
- Keep the lens very close to the glass (1-2 inches) to avoid vignetting (dark edges).
- Use a phone tripod or rig to stabilize the phone and lens - handholding a macro lens requires rock-solid steadiness.
DSLR Macro Lenses
If you’re shooting a DSLR or mirrorless camera, a 100mm macro lens (f/2.8) is the gold standard. It provides 1:1 magnification and enough working distance (3-4 inches) to avoid casting a shadow from the camera body.
For budget options, 50-60mm macro lenses run $200-400 used and work surprisingly well for reptile work. A 90mm macro (Tamron, Sigma, or Tokina brands) is $300-600 and more forgiving for enclosure work.
Composition and Framing
The Rule of Thirds
The Rule of Thirds is a foundational composition principle. Divide your frame into a 3x3 grid (most smartphone and DSLR viewfinders support this overlay). Place the subject’s head or most distinctive feature on an intersection line, not dead-center. This creates visual interest and guides the viewer’s eye naturally through the frame.
For a gecko climbing a branch, place its head on the upper-left intersection, with the branch flowing diagonally down and right.
Depth and Layers
Include foreground (enclosure décor in soft focus), the animal (sharp focus), and background (live plants or hides). This layered composition feels more dynamic than a flat, in-focus background.
To achieve this:
- Set your DSLR aperture to f/5.6 (as mentioned above).
- Position your subject 6-12 inches in front of the enclosure’s back wall.
- Frame so that cork bark or a plant leaf appears slightly out-of-focus in front of the gecko.
Capture Behavior, Not Just Pose
The most engaging enclosure photos show the animal doing something: eating, shedding, basking, or interacting. This requires patience and scheduling.
The best strategy: Check when your reptile is most active. Crested geckos are nocturnal - wait 30 minutes after lights out to photograph feeding behavior. Bearded dragons bask predictably in morning hours. Position your camera on a Joby GorillaPod Mobile Rig (a flexible tripod with ball joints that wrap around enclosure frames) and set a remote trigger or phone timer. This lets you capture natural behavior without the disturbance of holding a camera up to the glass.
Lighting and Glass Management
Use a Supplemental LED Light Panel
The Lume Cube Bicolor Panel Mini is a 4x4-inch LED panel that clips to a camera hot-shoe or can be mounted separately. It provides:
- Adjustable color temperature: Dial from 3200K (warm, matching incandescent) to 5600K (cool, daylight-balanced). This lets you neutralize warm heat lamps or add fill light without color shifts.
- Variable brightness: Dim the panel to 10% to avoid overexposing your subject, or push it to 100% for shadowy hides.
- Even coverage: Unlike a point-source flash, the panel spreads light across the enclosure, reducing harsh shadows.
Position the light 6-12 inches from the enclosure glass, angled at 45 degrees to the subject. This creates modeling light (visible dimension) without direct glare.
Angle Lights to Minimize Reflection
Reflections are your enemy. Instead of lighting straight-on (90 degrees perpendicular to the glass), angle your light source and camera at about 30-45 degrees from the glass surface. This skips the reflection across the glass and puts light on the animal instead.
If you’re photographing a crested gecko on a cork branch:
- Position the LED panel to the left of the enclosure, at a 45-degree angle.
- Position your camera to the right, also at 45 degrees.
- The light bounces off the cork and scales, not the glass.
Add Diffusion for Soft Light
A single LED panel can be harsh, creating hard shadows. Tape a sheet of diffusion material (translucent plastic, frosted acrylic, or even a white plastic shopping bag) over the panel. This spreads light more evenly and reduces shadows by 40-50%.
Handling Glass and Reflections
Clean the Glass First
Dust, water droplets, and shed skin on the enclosure glass destroy image sharpness. Before a photo session, clean the glass panel with a microfiber cloth and a glass cleaner or plain water. Pay special attention to edges and corners where dust settles.
Use Polarizing Filters
If you’re shooting a DSLR or mirrorless camera with macro lenses, a circular polarizing filter (CPL) reduces reflection by 60-80%. Screw it onto the front of your lens and rotate it until reflections disappear. This also increases color saturation and reduces atmospheric haze.
For phones, there are no true polarizing clip-ons, but anti-glare screen protectors (meant for phone screens) can reduce reflection slightly if placed over the phone’s lens. Effectiveness is mixed.
Shoot at Extreme Angles
Position your camera so the light reflecting off the glass is deflected away from your lens. A 30-45 degree angle (mentioned earlier) works because at this angle, the reflection bounces upward or downward, not back at your camera.
Avoid shooting straight-on (perpendicular to the glass). The reflection will always be visible.
Post-Processing Workflow
Even perfectly-lit enclosure photos benefit from minor tweaks in post-processing. This is where smartphone apps and free software shine.
White Balance Correction
If your in-camera white balance was slightly warm or cool, adjust it in post:
- Lightroom Mobile (free version): Slide the “Temp” slider left (cooler) or right (warmer).
- Snapseed (free, Android and iOS): Use the “Color” tool to warm up shadows or cool highlights.
- Exposure correction: If your photo is underexposed (darker than intended), increase exposure by 0.5 to 1 stop. Avoid pushing over 1.5 stops, which introduces noise.
Contrast and Saturation
Enclosure photos often lack “pop” because the background (green plants, brown cork) competes with the animal. Increase contrast by 10-15 points and saturation by 5-10 points. This makes scales and eye detail more visible without looking unrealistic.
Selective Focus and Blur (Shallow Depth Adjustment)
If part of your photo is out of focus but shouldn’t be (e.g., the tail is slightly soft), use Snapseed’s “Selective” or Lightroom’s “Adjustment Brush” to sharpen just that area. Conversely, if background details are distracting, slightly blur the background layer to draw focus to the animal.
Be conservative: a blur radius of 2-5 pixels looks natural; anything over 10 looks obviously edited.
Troubleshooting: Common Mistakes and Problems
Mistake 1: Ignoring White Balance and Ending Up With Orange Photos
Solution: Set white balance manually to Tungsten (3200K) when using incandescent heat lamps. You’ll see the preview get cooler/bluer, which looks right. Auto white balance tries to “correct” the warm light, resulting in color information loss.
Mistake 2: Over-Relying on Zoom and Losing Detail
Solution: Move closer physically (with proper lighting) rather than zooming digitally. Digital zoom is interpolation - it creates blurry pixels that simulate magnification. Optical zoom (or physically moving closer) captures actual detail.
Mistake 3: Shooting Against Overexposed Backgrounds
Solution: If the enclosure’s heat lamp, LED panel, or a window in the background is blown out (pure white), your camera’s meter gets confused and underexposes the animal. Spot-meter on the animal’s body, or use exposure lock (tap and hold on the animal with your phone), so the animal is properly exposed even if the background clips.
Mistake 4: Capturing the Animal’s Stress Behavior
Solution: Dimming lights, moving slowly, and allowing the animal 2-3 minutes to settle before shooting prevents gaping mouths, stress coloration, or fleeing. Avoid photographing during feeding if the animal is in a striking posture - wait for calm moments instead.
Problem: All your photos are soft/blurry, even with fast shutter speeds.
Check: Are you shooting through glass? If yes, ensure glass is clean and your camera is focused on the animal, not the glass. Try tapping on the animal’s body in your phone’s viewfinder to lock focus, or use back-button focus (available on most DSLRs) to separate focusing from shutter release. Shoot a few test frames at f/8 instead of f/2.8 — the larger depth-of-field may compensate for minor focus hunting.
Problem: Your white balance is consistently too warm (orange/yellow tint).
Switch to manual white balance. If your camera has a Kelvin slider, set it to 4500K (incandescent) instead of auto. On a phone, open a manual camera app (Halide, Adobe Lightroom Mobile, Moment) and tap the white balance icon; select “Tungsten” or dial in 3500-4000K. Test a frame and adjust from there.
Problem: Reflections are overwhelming, even at 45-degree angles.
Try shooting at an even more extreme angle (up to 60 degrees) or wait for a cloudier day (fewer reflections from windows). Alternatively, place a matte black cloth or foam board behind the camera to eliminate reflections of the camera itself in the glass.
Problem: The enclosure’s background (plants, hides) is distracting and blurry.
Increase your aperture to f/8 or f/11 to get more depth-of-field (more of the background in focus, but softer). Or, recompose so the background is less busy - move your camera angle to a different corner of the enclosure. Sometimes a simpler background (like a plain cork hide) photographs better than a densely-planted setup.
Frequently Asked Questions
Q: Can I use a phone flash to light my reptile’s enclosure?
A: No, avoid phone flashes. They’re too bright and too blue (5500K+), causing the animal to squint and resulting in blown-out eyes and unnatural color. Use a dedicated LED panel like the Lume Cube instead, which you can control and position precisely. If you must use flash, use it off-camera (mounted on an external bracket) bounced off a white card, and dim it to 1/4 power or less.
Q: How often should I clean the enclosure glass before photographing?
A: Before every photo session, especially if it’s been more than a week since the last cleaning. Dust, water droplets from misting, and shed skin accumulate and cause soft focus. A quick wipe with a microfiber cloth takes 30 seconds and makes a visible difference.
Q: What’s the best time of day to photograph my reptile?
A: During the species’ most active period and when natural light isn’t competing with your supplemental lights. Crested geckos are nocturnal - photograph them 30 minutes after lights out. Bearded dragons and other baskers are most photogenic in morning light when they’re active but not yet in peak heat-seeking mode. Avoid midday if large windows are nearby, as window light will cast competing shadows.
Q: Can smartphone photos compete with DSLR photos of reptiles?
A: Yes, with proper technique and lighting. Modern flagship phones have 48-108MP sensors and excellent computational photography. The bottleneck isn’t the camera - it’s lighting control and patience. A well-lit smartphone photo with the Xenvo macro lens will outshine a flat DSLR photo taken with auto white balance and built-in flash.
Q: Do I need a tripod for reptile photography?
A: For enclosure work, a tripod or flexible rig like the Joby GorillaPod (which wraps around cage frames) is nearly essential. Hand-holding a camera to the glass causes micro-vibrations, softness, and frustration. A $15 flexible phone tripod or $40 GorillaPod transforms stability and lets you capture behavior hands-free.
Related Reading
For more on reptile care and documentation, see Crested Gecko Humidity and Temperature Management Guide and Best Crested Gecko Starter Kits: What’s in the Box and What to Add. If you’re working with newly-acquired animals, How to Safely Handle and Tame a New Reptile covers stress-free handling techniques that make animals more comfortable during photo sessions.
This post contains affiliate links. As an Amazon Associate, I earn from qualifying purchases at no extra cost to you.