Breeding Leopard Geckos: Egg Incubation and Hatchling Care
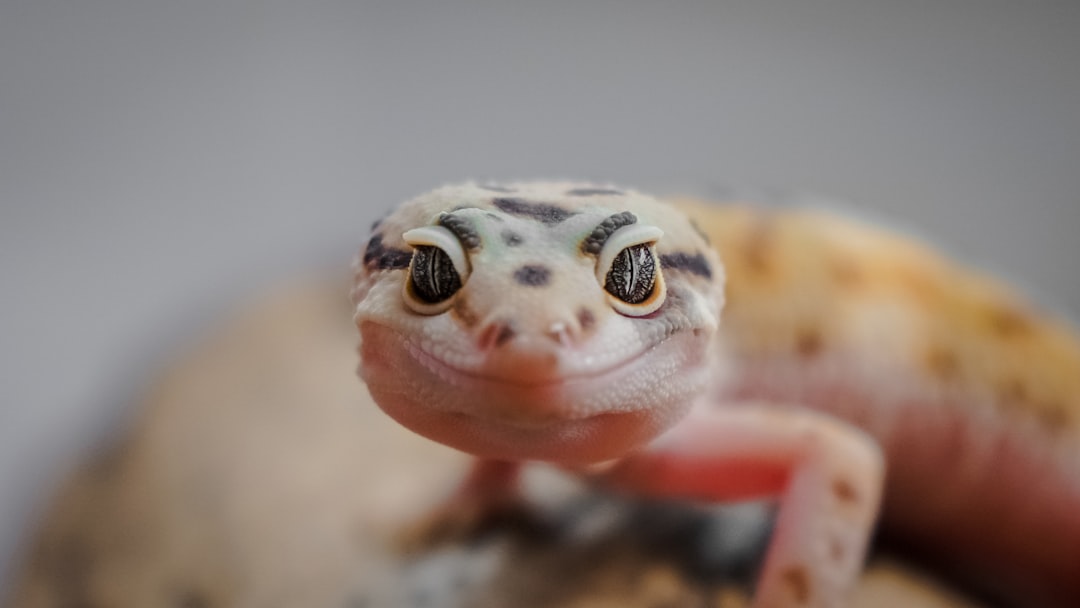
Photo by verdian chua on Unsplash
This post contains affiliate links. As an Amazon Associate, we earn from qualifying purchases at no extra cost to you.
Breeding leopard geckos is one of the most rewarding experiences a keeper can have - but it’s also one of the most demanding. The process begins long before eggs are even laid, requiring you to think through conditioning, genetics, egg care, and newborn husbandry all at once. Many new breeders jump into the process excited about producing hatchlings, only to discover that egg incubation temperatures need to be precise, hatchlings are fragile, and the responsibility extends well beyond the moment they pip out of their shells.
This guide walks you through every stage of leopard gecko breeding - from preparing your adult pair through raising confident, healthy hatchlings ready for their forever homes. Whether you’re breeding for line improvement, color morphs, or simply to expand your love for the species, the foundation is the same: careful planning, consistent conditions, and attention to detail. For broader leopard gecko care context, start with our leopard gecko care guide for beginners before diving into breeding.
Conditioning Adults for Breeding
Before you even think about pairing geckos, your breeding stock needs to be in peak condition. You’ll need healthy, well-fed adults of breeding age - females should be at least 18-24 months old and males 12-18 months, though older animals often produce better clutches. You’ll also need to verify that your female has adequate fat reserves and bone density, since egg production is calcium-intensive. Underweight or calcium-deficient females risk hypocalcemia, a potentially fatal condition during laying.
The conditioning period typically lasts 4-8 weeks. During this time, increase feeding frequency to every other day or daily, and offer high-fat insects like dubia roaches and waxworms alongside your staple crickets. Females especially need extra calcium and fat reserves to support egg production. Many breeders gut-load insects heavily during conditioning, using calcium with D3 twice weekly. This aligns with supplementation protocols documented by the Gecko Time community resource, which covers conditioning cycles for productive breeding seasons.
Housing males and females separately during conditioning allows you to monitor food intake individually and prevent premature breeding stress. Keep temperatures in the warm enclosure around 88-92 degrees Fahrenheit during the day to encourage metabolic activity. Look for females to gain visible weight and body condition - you want them plump and healthy, not obese.
Once females show robust condition - usually after 4-6 weeks - you can introduce the male for breeding. Leopard geckos are generally receptive during warmer months, and many breeders find spring and early summer produce the most successful clutches. Watch for courtship behavior: the male will vibrate his tail, do a characteristic “dance,” and attempt to copulate. Females ready to breed will typically be receptive, though you may need to leave the pair together for several days or a week to ensure successful mating. Never leave the male unsupervised for more than a few hours the first time - aggressive males can injure females.
Egg Laying and Incubation Setup
After successful mating, you’ll have roughly 10-21 days before eggs appear. Gravid females will eat less, spend time in their warm hides, and gradually become heavier. Many breeders set up a dedicated lay box within the female’s enclosure - a small plastic container with moist sand or coconut husk, kept at 85-88 degrees Fahrenheit, giving her a specific location to deposit eggs.
Eggs are typically laid in pairs. Most females will produce 4-8 clutches throughout a breeding season, with clutches spaced 10-14 days apart. Once you notice a female has laid, carefully retrieve the eggs and mark the top with a permanent marker - this is critical, as rotating eggs during incubation disrupts proper development.
Store eggs at room temperature (68-72 degrees Fahrenheit) for no more than 7-10 days before starting incubation. Some breeders prefer to incubate immediately, while others store briefly if their incubator isn’t yet ready. Keep eggs in a stable environment during storage - temperature swings and vibration can damage developing embryos before incubation even begins.
Incubation is where precision becomes non-negotiable. Leopard gecko eggs need a warm, humid environment with minimal temperature fluctuation. You have two main approaches: using a dedicated reptile incubator or building a simple DIY setup. Research on temperature-dependent sex determination (TSD) in leopard geckos, published in studies available via NCBI, shows that incubation temperature directly determines sex ratio and influences hatchling health outcomes.
For an all-in-one cabinet option, consider this 23L reptile egg incubator. Its listed 10-40 C heating and cooling range covers common leopard gecko incubation targets, but verify its temperature with a separate calibrated thermometer before trusting a clutch. If you’re budget-conscious or want more control, you can use a small cooler, heating tape with a thermostat, and an incubation medium.
Your incubation medium is crucial. Pick up Gardenera Organic Perlite, 4 Quart Bag - it’s the industry standard for leopard gecko eggs. Mix it with water to a damp (but not wet) consistency: when squeezed, it should hold its shape but not drip. This balance maintains humidity while preventing mold and bacterial growth.
The IRIS USA 6-quart clear storage bins provide separate, visible containers for organizing clutches. Confirm the dimensions suit your incubator before ordering, and modify ventilation deliberately rather than assuming a sealed bin is ready for eggs. Drill small air holes in the lid and sides for gas exchange.
Many serious breeders use a plug-in thermostat to dial in precise temperatures. Consider the Inkbird ITC-306T Wi-Fi Temperature Controller. Use its independent probe to control a compatible heater, stay within the controller’s listed electrical load, and verify the actual incubation temperature with a separate thermometer.
The Incubation Process: Step by Step
Incubation requires careful attention to temperature and humidity. Here’s the process:
-
Prepare your incubation containers. Fill each plastic tub with 2-3 inches of moist perlite. Create small indentations in the medium and nestle eggs half-buried into the substrate. They should rest snugly enough to stay in place but not be compressed. Label each container with the laying date, female ID, and clutch number.
-
Set and monitor temperature. Leopard gecko eggs incubate at 78-80 degrees Fahrenheit for mixed-sex hatchlings, 80-82 degrees for predominantly female hatchlings, or 74-77 degrees for predominantly male hatchlings. This is temperature-dependent sex determination in practice. Set your incubator or heating system to your target temperature and let it stabilize for 24 hours before adding eggs. Use a reliable thermometer - not the incubator’s built-in readout alone - to verify accuracy.
-
Maintain incubation conditions. Check eggs every 2-3 days. Watch for mold (white or colored fuzzy growth) - if you spot it, gently wipe the egg with a damp cotton swab and improve ventilation. Mist the medium lightly once or twice weekly if it’s drying out. The goal is “slightly damp” - not soggy, not desert-dry.
Incubation takes 55-75 days depending on temperature. Warmer incubation (80-82 degrees Fahrenheit) tends toward the shorter end, while cooler temps extend it. Eggs will gradually lose weight and develop a slightly wrinkled appearance near pip time - this is normal and expected as the embryo absorbs remaining moisture before hatching.
Hatching and Early Feeding
As incubation nears completion, you’ll notice eggs becoming slightly deflated. Hatchlings typically start “pipping” (making the first hole) around day 55-65. Once a hatchling makes its first pip, it may take 24-48 hours to fully emerge - resist the urge to help unless you’re certain something is wrong (no progress after 48+ hours, bleeding, or pipping in the wrong location).
After hatchlings emerge, leave them in the incubation container for another 24 hours. This allows them to absorb the remaining yolk sac and dry completely. Their color will look dull and flat at first - don’t worry, this changes as they settle.
Move hatchlings to a quarantine setup once fully dry. You’ll want small, secure enclosures - this is where the Sterilite 6-quart clear storage boxes, pack of four shines. Drill air holes in the lid and sides, and set up a simple enclosure with:
- A 40-watt under-tank heater set to 88-90 degrees Fahrenheit on one end
- A small hide on the warm side (a bottle cap or small box works)
- A cool hide on the unheated side
- Paper towel substrate (easy to clean and monitor waste)
- A shallow water dish
Hatchlings are vulnerable to dehydration and stress. Keep handling minimal for the first week, and maintain stable temperatures and humidity. Watch for signs of distress: lethargy, labored breathing, or refusal to move after day 7.
Hatchling leopard geckos live off their yolk sac for 3-5 days post-hatch. Start offering food around day 5-7, when they become more active. Offer appropriately-sized insects - pinhead crickets and newborn dubia roaches are ideal. Hatchlings have small mouths, so size matters more than you’d think. Insects longer than the width of the hatchling’s head are too large and can cause impaction or injury.
Dust insects lightly with calcium powder (with D3 twice weekly, without D3 on other days). Feed hatchlings every 1-2 days, offering 3-5 insects per meal. They’ll eat when they’re hungry, and you’ll quickly learn each individual’s appetite pattern. Remove uneaten insects after an hour to prevent stress.
This is the critical period for establishing feeding response and early growth. Healthy hatchlings should gain weight steadily and shed regularly (typically every 1-2 weeks as they grow). For detailed dietary guidance through the juvenile phase, see our leopard gecko diet guide, which covers feeder species, supplementation schedules, and nutrition across life stages.
If a hatchling is sluggish, refuses food, or fails to gain weight, isolate it and boost temperatures to 90-92 degrees Fahrenheit for a few days to encourage metabolism. Ensure fresh water is available at all times - hatchlings dehydrate quickly in low-humidity environments.
Hatchling Care and Development
Once hatchlings are feeding reliably (usually by week 2-3), you can think about their longer-term setup. Many breeders keep hatchlings in small tubs for the first 3-6 months before graduating them to larger enclosures. This approach makes monitoring easier and reduces the stress of a huge space. A new animal in a 20-gallon enclosure will hide constantly and become difficult to observe.
Keep quarantine conditions stable: 88-90 degrees Fahrenheit on the warm side, humidity around 40-60%, and minimal handling. Hatchlings are curious but fragile - their bones are still mineralizing, and injuries from falls or drops can be devastating.
As they grow, start introducing varied prey. By month 2-3, most hatchlings will accept small crickets, small roaches, and the occasional small mealworm. Diversity in diet ensures better nutrition and helps prevent picky eating later. For a broader discussion of quarantine protocols that applies to hatchlings and newly acquired geckos alike, see our quarantine tank guide.
Watch for retained shed, particularly around the eyes and toes. If skin doesn’t come off cleanly, boost humidity slightly and offer warm soaks by misting the animal gently. Most hatchlings clear retained shed within 24-48 hours with this help. If retained shed persists or affects vision, consult a reptile veterinarian.
You’ll want proper heating for longer-term growth. Our guide to leopard gecko enclosures and heating setups covers temperature gradients and equipment that scale as hatchlings grow. By 3-4 months, many hatchlings are ready to transition into juvenile-sized enclosures with more enrichment options.
Common Mistakes and Troubleshooting
Even experienced breeders encounter incubation challenges. Here are the most common problems and what to do about them:
Eggs aren’t developing (no veining visible after 2-3 weeks). This usually means either the eggs weren’t fertile or temperatures are too low. Verify your thermostat is accurate - many incubators run 2-3 degrees Fahrenheit warmer or cooler than their dial suggests. Check with an independent thermometer.
Mold or fungal growth on eggs. Mold thrives in overly moist conditions. Reduce misting frequency, improve air exchange (larger air holes, slightly warmer temps), and gently clean affected eggs with a dry cotton swab. If mold is extensive, the clutch is likely lost.
Eggs collapse or deflate before hatching. This indicates either bacterial infection (from contamination) or humidity that’s too high for too long. Ensure your incubation medium is damp, not waterlogged. If one egg gets infected, it can spread - isolate problem eggs immediately.
Hatchlings pip but don’t emerge after 48 hours. Humidity may be too low, making the membrane difficult to break through. Slightly increase misting around pipping eggs. If there’s no progress after 72 hours and no bleeding, you may need to carefully assist - but only as a last resort and with gentle, sterile technique.
Hatchlings are lethargic or refuse food after emerging. Check temperatures immediately - they should be 88-90 degrees Fahrenheit. Cold hatchlings stop feeding and can die quickly. Once temps are corrected, most bounce back within 24-48 hours.
High frequency of retained shed in hatchlings. Often caused by low humidity (below 40%) or inadequate feeding. Boost humidity to 50-60% and increase feeding frequency slightly. Mist hatchlings gently with lukewarm water every 1-2 days during the shed cycle.
FAQ
How many eggs do leopard geckos typically lay per season?
Most females produce 4-8 clutches per season, with each clutch containing 2 eggs. Some females lay more, especially older, experienced breeders. Clutches are spaced 10-21 days apart, with most female leopard geckos breeding from spring through early fall.
Can I incubate eggs at room temperature without a dedicated incubator?
Not reliably. Room temperatures fluctuate throughout the day and seasonally, which disrupts development and extends incubation unpredictably. Many eggs fail to develop or hatch successfully at variable temperatures. A dedicated incubator, even a simple DIY setup with a thermostat, is essential for consistent results.
What’s the survival rate for captive-bred leopard gecko hatchlings?
With proper incubation and care, survival rates typically range from 70-90%, depending on your setup and experience. Failures are usually tied to fertility issues (unfertilized eggs), temperature problems during incubation, or husbandry mistakes early in the hatchling phase. Each season and individual clutch varies.
How do I know if eggs are fertile?
Fertile eggs typically show veining within 10-14 days of incubation - you’ll see a network of blood vessels if you candle them (hold them to a bright light). Infertile eggs remain white and opaque without visible structure. If you see no veining after 3 weeks, the eggs were likely never fertile.
When can I move hatchlings to a larger enclosure?
Most breeders keep hatchlings in small containers for 3-6 months to simplify monitoring and reduce stress. By 4-6 months, when they weigh 3-5 grams and are feeding confidently, they’re ready for a 10-gallon or 20-gallon long enclosure. Avoid huge spaces early - hatchlings get lost and stressed in oversized enclosures.
Do I need to separate male and female hatchlings?
Not immediately, but you should separate them by 6-9 months before sexual maturity. Males will start territorial behaviors, and females may become gravid if housed with males. Knowing your hatchlings’ sexes early (via visual cues by 4-5 months) helps with long-term planning.
Breeding leopard geckos teaches you about their biology in ways that passive keeping simply can’t match. You’ll learn the subtle signs of readiness, the precision required for incubation, and the vulnerability of newborn animals. You’ll also experience the incredible moment when a hatchling first emerges - alert, grasping for life, entirely dependent on the system you’ve created.
The responsibility doesn’t end at hatching. Hatchlings demand attention, consistency, and care for months as they grow. Bookmark this guide, keep detailed notes on each clutch, and share it with fellow keepers who are ready to take the next step in their reptile journey.