Feeder insect breeding colonies for crested gecko keepers
This post contains affiliate links. As an Amazon Associate, I earn from qualifying purchases at no extra cost to you.
Most crested gecko keepers never need to breed a single insect. A quality complete diet covers the nutritional baseline, and a tub of purchased crickets covers the occasional hunting session. So why would anyone take on bins, heat, and a faint cricket chirp in the spare room?
The honest answer is cost, quality control, and convenience, in that order. Once you are feeding insects to several geckos weekly, or you are raising hatchlings that benefit from a steady supply of tiny prey, store runs and shipping fees add up quickly. A small, well-run colony gives you a fresh, gut-loaded supply on your own schedule, and you control exactly what those insects ate before your gecko eats them.
My position is simple: a feeder insect colony is worth it for keepers with three or more insectivorous animals, a breeding project, or a strong enthusiasm for the husbandry side of the hobby. For a single pet crested gecko, buying small batches is usually smarter. This guide covers how to decide, which species to start with, how to build a colony that does not crash, and how to prepare the insects so they actually benefit your gecko.
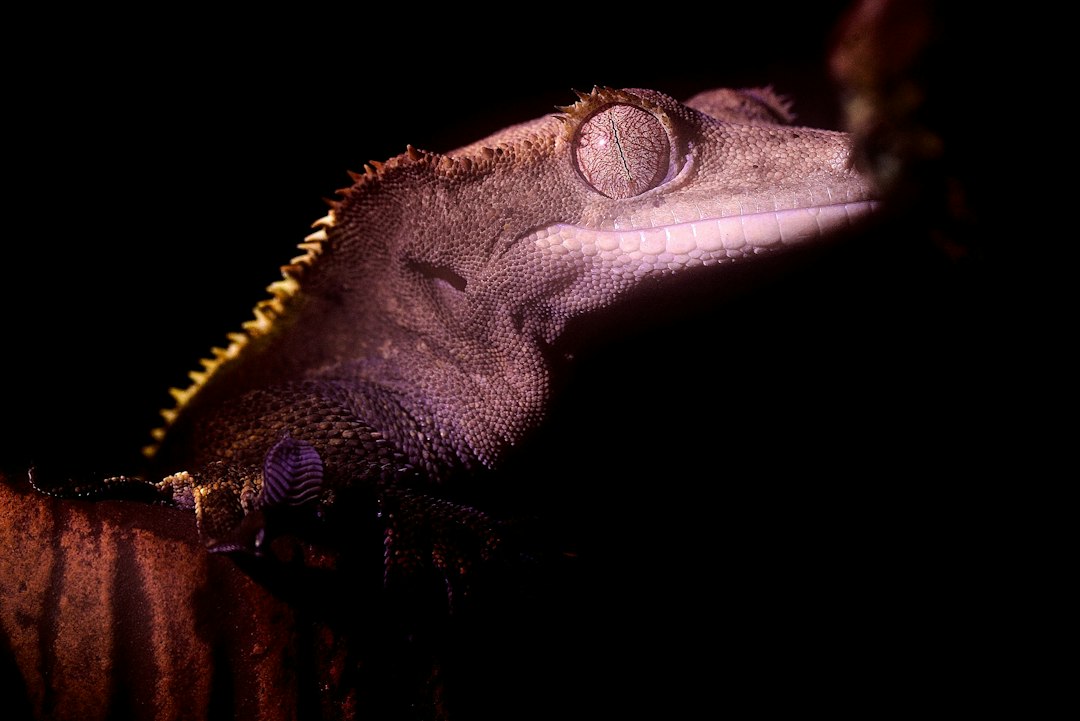
Photo by Andrey Tikhonovskiy on Unsplash
Do You Really Need Feeder Insect Breeding Colonies for Crested Geckos?
Crested geckos are omnivores that thrive on a prepared powdered diet mixed with water. Established husbandry practice treats insects as enrichment and a supplement, not the foundation. That framing matters because it decides how big your colony should be. If insects make up a minor share of the diet, a bin the size of a shoebox may be plenty.
Here is a practical way to think about it. A single adult crested gecko offered a few appropriately sized insects once or twice a week eats perhaps a dozen insects per week. A pack of purchased crickets covers that for roughly a month if you keep them alive and fed. Breeding your own for that demand is optional, and the setup effort will outweigh the savings for a long time.
The math changes in a few situations:
- You keep multiple species. Leopard geckos, dart frogs, or other insectivores can consume hundreds of insects per week. If that describes your collection, the leopard gecko breeding guide shows how quickly feeder demand scales with hatchling counts.
- You breed crested geckos. Hatchlings and juveniles often accept small, soft-bodied prey readily, and a colony supplies appropriately small insects (pinhead crickets, small dubia nymphs) on demand.
- You want quality control. Store-bought insects often arrive underfed. In your own colony, you decide what goes into the gut load.
- You live far from a pet store. Shipping live insects in summer or winter carries risk, and a home colony reduces dependence on it.
If none of those apply, consider skipping the colony and reading which live insects suit crested geckos and how to culture them as a lighter-weight introduction. You can always scale up later.
One caution before you commit: a colony is a living system that needs warmth, ventilation, food, and monitoring. It is not a set-and-forget project, and neglected colonies collapse messily. Be ready for five to ten minutes of care every few days.
Choosing Species for Feeder Insect Breeding Colonies
The best species for your colony depends on your tolerance for smell, noise, and escapes, plus what your local laws allow. For crested gecko keepers, three options deserve serious consideration.
Banded Crickets
Banded crickets (Gryllodes sigillatus) are the beginner-friendly choice. They are quieter and less odorous than the common house cricket, they tolerate typical household room temperatures better, and they reproduce quickly. A starter group such as the Josh’s Frogs 1/2” young banded feeder crickets can help you establish a breeding population rather than a single-generation supply. At half an inch, they are a sensible size for juveniles and a good grow-out batch for adults.
Crickets have downsides. They can climb and jump when given the chance, they die off quickly when conditions slip, and the colony needs egg-laying medium and regular cleaning. They are the highest-maintenance option per feeding but also the cheapest to start.
Dubia Roaches
Dubia roaches (Blaptica dubia) are the stability pick. Females give live birth, adults cannot fly, and nymphs cannot climb smooth plastic or glass walls. They are quiet and have little odor when kept dry. A colony with a healthy sex ratio produces steadily and tolerates a missed cleaning better than crickets do.
The tradeoffs are heat and law. Dubias breed best when the bin sits warm, typically around the mid-to-upper 80s Fahrenheit, which means a heat source in a room that may otherwise sit in the 70s. They are also restricted or regulated in some jurisdictions (Florida is a commonly cited example), so check your state and local rules with your wildlife or agriculture agency before buying. The USDA’s Animal and Plant Health Inspection Service is a starting point for federal rules on moving live insects.
Black Soldier Fly Larvae and Others
Black soldier fly larvae are a natural calcium-rich option that can be cultured in a bin with a waste substrate, though the adult fly stage complicates a household setup. Discoid roaches climb better than dubias, and superworms and mealworms need cooler, simpler enclosures but are fatty and chitinous. Most crested gecko keepers do well with crickets or dubias and rotate in occasional extras.
A Quick Recommendation
If you are starting from zero, I recommend banded crickets for a first colony, then adding dubias if you decide to scale. Crickets teach you about gut loading, airflow, and bin hygiene at low cost. Dubias reward you later with consistent yield. Avoid starting two species in the same week, because troubleshooting two crashes at once teaches you very little.
Setting Up Feeder Insect Breeding Colonies Step by Step
The following process works for crickets and, with minor adjustments, for dubias. Gather everything first so a half-built bin does not sit around attracting problems.
What you need: a lidded plastic storage bin (roughly 10 to 20 gallons), a ventilation window cut in the lid and covered with fine metal or nylon mesh, egg cartons or cardboard tubes for hiding space, a shallow water source, a small feeding dish, a laying medium for crickets, a low-wattage heat source, and a thermometer.
- Cut the ventilation. Cut a large rectangle out of the bin lid and secure fine mesh over it with hot glue or silicone. Mesh must be tight enough to stop pinhead nymphs. Airflow prevents the damp, stale air that causes die-offs.
- Add vertical surface area. Stack egg cartons or cardboard tubes upright so insects can spread out. Crowding on a single surface leads to cannibalism and stress.
- Create a smooth upper band. Run a strip of packing tape or a slick plastic rim around the upper inside wall. This slows climbers and keeps escapes down.
- Set up heat. Place a heat mat on the side of the bin or under half the base, not the whole thing, so insects can move to a cooler zone. Connect it to a thermostat, and see the reptile thermostat guide for why a controller matters more than the heater brand. Verify the temperature with a probe thermometer at insect level.
- Provide water safely. Use a shallow dish filled with water-storing crystals or a sponge so small insects do not drown. Replace or refresh it every few days.
- Add the laying medium (crickets only). A small container of slightly damp coco fiber or peat-free substrate gives females a place to deposit eggs. Remove it after a week, keep it moist and warm in a separate container, and wait for pinheads.
- Introduce your starter group and feed. Add the insects, offer a dry feeder diet plus fresh produce, and watch for a few days before changing anything.
The Five-Star Feeders Cricket Diet is one option that can serve as the daily base ration, since it is described as a calcium-rich, balanced diet for crickets and other feeder insects. Treat it as a staple and add fresh vegetables for moisture and variety, rather than relying on a single food.
Location and safety. Keep the colony in a stable, ventilated place away from your gecko enclosures. Electrical heat mats and thermostats near water demand caution: keep cords off damp surfaces, use a thermostat, and never leave an unregulated heater running. Escapees are a fact of life, so keep a lid latch or weight on the bin and avoid placing the bin where a gap behind furniture lets escapees vanish.
Gut Loading and Supplementing Colony Insects
Raising your own insects only pays off if the insects are nutritious when your gecko eats them. Feeder insects are mostly water and protein, and their calcium-to-phosphorus ratio is naturally poor. Two tools improve that: gut loading and dusting.
Gut Loading
Gut loading means feeding insects a nutrient-dense diet so their digestive tracts are full of good material when your gecko eats them. A practical routine has two stages. In the colony, offer a balanced dry diet and fresh produce continuously. Then, 24 to 48 hours before feeding, move the insects you plan to use into a temporary container and give them an intensive gut load. That short window is enough for the gut to fill without losing the benefit.
Good produce choices include leafy greens such as collards, mustard greens, and dandelion greens, plus squash, sweet potato, and carrots. Avoid spinach in bulk because of its oxalate content, and skip citrus, avocado, and anything moldy.
A commercial gut-load supplement can help fill the gaps. Repashy SuperLoad is one option to consider. Read the Repashy product page and label for current directions and ingredients, because formulations and instructions change. The main tradeoff is that it adds recurring cost, so use it for the pre-feeding window rather than as an everyday colony ration.
Dusting
Dusting means coating insects lightly in a powder just before feeding. For crested geckos on a complete diet, insects usually do not need heavy dusting every feeding. Over-supplementation of vitamin D3 or vitamin A is a real concern, so if you also feed a complete diet, the supplement plan should be coordinated with the label directions and your veterinarian. The guide to calcium and vitamin supplements for crested geckos walks through how those products interact, and the nutrition label breakdown explains what the complete diet already provides.
A reasonable general approach, consistent with common husbandry guidance, is to dust insects lightly with calcium at some feedings, and to use a multivitamin less often. Confirm the schedule with a reptile-experienced veterinarian, especially for breeding females, who have higher calcium demands. The Association of Reptile and Amphibian Veterinarians directory can help you find one.
Colony Size, Yield, and Feeding Amounts
Overbuilding is a common error. A large colony consumes space, food, and time, and a heavy surplus just dies in the bin. Match your colony to actual demand.
Use the rough comparison below to plan. Figures are approximate starting points and depend on temperature, food quality, and husbandry.
| Factor | Banded crickets | Dubia roaches | Black soldier fly larvae |
|---|---|---|---|
| Typical breeding temperature | Low-to-mid 80s F | Mid-to-upper 80s F | Warm room temperature and up |
| Smell and noise | Moderate, chirping | Low, quiet | Moderate, depends on feed |
| Escape risk | Higher (jump and climb) | Lower (nymphs and adults can’t climb smooth walls) | Low as larvae, high as adult flies |
| Time to usable size | A few weeks | Several months | A few weeks |
| Start-up effort | Low | Moderate | Higher |
| Legal restrictions | Rarely restricted | Restricted in some areas | Varies |
| Best for | First colony, hatchlings | Long-term steady supply | Supplemental, calcium-rich treat |
Notice the time-to-yield column. Crickets reward you fast, while dubias demand patience. If you need insects in a month, buy some while the colony builds.
How Much to Feed Your Gecko
Prey should be no larger than the space between your gecko’s eyes. For adults, a small handful of appropriately sized insects offered once or twice weekly is plenty alongside the complete diet. For juveniles, small insects a couple of times weekly can support growth, but never replace the powdered diet. For structure around meal timing and portions, see the crested gecko feeding schedule by age.
Offer insects in a shallow, smooth-sided dish or let the gecko hunt in a feeding tub if it is a confident eater. Remove uneaten insects within a few hours, because loose crickets can stress or even nibble a sleeping gecko. This is a genuine problem, not a theoretical one, so do not leave live crickets in the enclosure overnight.
Harvesting and Culling
Harvest from the colony in a way that leaves breeders alone. For crickets, shake cartons over a catch container, taking medium-sized nymphs and leaving the largest adults and a handful of smaller stages to keep breeding rolling. For dubias, remove excess males and mid-sized nymphs while retaining a ratio of roughly one male to several females. If your colony outgrows demand, slow breeding by reducing heat or moisture rather than letting it overpopulate.
Common Feeder Insect Colony Mistakes and Troubleshooting
Colonies rarely fail dramatically on day one. They fail slowly because small errors compound. These are the most common problems and how to correct them.
Too much moisture. Damp bins grow mold, attract mites, and cause die-offs. If condensation beads on the lid, increase ventilation, reduce wet produce, and replace water crystals more often. Remove uneaten fresh food within a day.
Too little ventilation. A sealed bin traps humidity and ammonia. If you smell sharp ammonia or see lethargic insects clustered near the lid, the airflow is inadequate. Enlarge the mesh window.
Temperature swings. Heat mats without thermostats overheat bins, while cold rooms stall breeding. If your cricket population is dying overnight, measure the bin temperature at insect level before changing anything else.
Overcrowding and cannibalism. If you see missing legs, chewed wings, or a lack of nymphs, the colony may be too dense or short on protein. Add more vertical cardboard and offer a higher-protein feeder diet.
Feeding only one thing. A colony living on carrots alone will show reduced reproduction and weaker nutrition. Rotate dry feeder diet, greens, and vegetables.
Skipping the pre-feeding gut load. Insects pulled straight from a bin of leftover scraps are nutritionally unpredictable. Always do a 24 to 48 hour gut load before feeding.
Ignoring pests. Mites, flour beetles, and phorid flies can invade bins, especially with wet food. Keep food dry and replaced regularly, quarantine new insects for a week, and never add insects from the wild to your colony, since wild-caught insects can carry parasites and pesticide residue that harm your gecko.
Using the wrong insects for the gecko. Insects that are too large, too hard-shelled, or too fatty cause problems. Avoid feeding fireflies, which are toxic to reptiles, and avoid wild-caught anything. If your gecko shows weight loss, regurgitation, or lethargy after insect feedings, the crested gecko weight loss guide explains what to track and when to call a veterinarian.
Letting escapes run loose. A few loose crickets are annoying. A wall of escaped nymphs can colonize your home. Latch lids and check seams regularly.
When a colony does crash, resist the urge to dump everything and start over. Salvage a small group of healthy adults and clean the bin thoroughly with hot water, then rebuild slowly. Most crashes trace back to humidity, heat, or airflow, and the fix is usually adjusting one variable at a time.
Frequently Asked Questions
Do crested geckos need live insects at all?
No. A complete crested gecko diet is designed to meet their nutritional needs on its own, and many keepers never offer insects. Live prey is best viewed as enrichment and a supplementary protein source that encourages natural hunting behavior. If you do offer insects, keep them appropriately sized and use them as a small part of the overall diet. If your gecko refuses insects entirely, that is generally not a health problem as long as it is eating its complete diet, maintaining weight, and showing normal activity. Check body condition regularly and consult an exotics veterinarian if you see sudden changes in appetite, weight, or behavior.
How long does it take a new cricket colony to produce usable feeders?
With adult or near-adult starter crickets, you can expect eggs within a week or two of providing a suitable laying medium, and hatchlings after roughly one to two weeks of incubation at warm temperatures. From there, nymphs need several additional weeks to reach a size useful for adult geckos. Realistically, plan on about a month to six weeks before the colony gives you a steady, self-sustaining supply. Because timing varies with temperature and food quality, keep buying small batches until the colony proves itself rather than relying on it immediately.
Is it cheaper to breed feeder insects than to buy them?
Usually, but only at scale. A single-gecko household often spends more on bins, heat mats, thermostats, and gut-load products than it would on a few purchased packs of crickets. The savings appear once you feed multiple animals, raise juveniles, or breed geckos and need steady quantities. Dubias in particular have a higher start-up cost and a longer ramp, but they produce reliably over time. Run the numbers on your actual weekly consumption before building anything, and remember to count the time you spend cleaning, feeding, and monitoring the colony.
Can I keep a feeder colony in the same room as my geckos?
You can, but plan the layout carefully. Crickets chirp, which may disturb light sleepers, and escaped insects can reach enclosures. Keeping the colony in a separate cabinet or a closet with good ventilation reduces noise and spills. Make sure the colony room has stable temperatures and that the bins are secure. If you have a dedicated space, the reptile room setup guide covers shelving, ventilation, and power layout that also work well for insect bins.
Conclusion
Feeder insect breeding colonies make sense when your demand is steady and your setup is organized. Start with one species, preferably banded crickets, build a ventilated and temperature-controlled bin, keep the moisture low, and gut load before every feeding. Scale only after your first colony has run smoothly for a couple of months.
Your next action is small: decide how many insects your animals actually eat each week, then buy a modest starter group and one bin. Watch the colony for two weeks, adjust ventilation and heat, and only then consider expanding. If the work feels tedious, buying small batches remains a perfectly good option, and your crested gecko will not know the difference.
If this guide helped, bookmark it for your first colony setup and leave a comment with the species you plan to start with.
Related reading